| Assembling by S. Weiller |
Assembling by S. Weiller
Assembling by R. Labre
Assembling by Y. Lhoumeau
Others assembling extracted from the Web
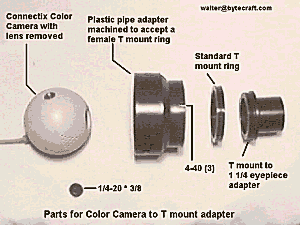
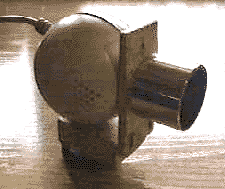
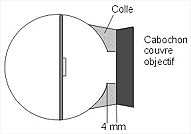
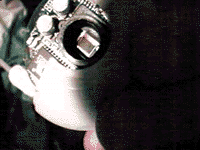
Making a "C" mounting (S. Weiller)
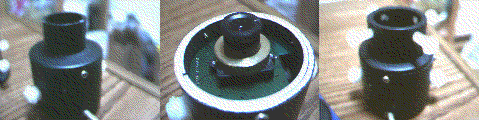
This assembling could be ideally used with a QuickCam VC or a QuickCam pro. This modification, suggested by Sylvain Weiller, allows the mounting of an 31.7mm adapted made in plastic pipe adapter which is turned with a drilling machine.
More interesting examples,
so amateurs didn't lack ideas :-)
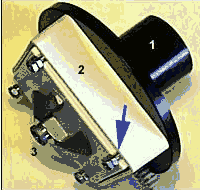
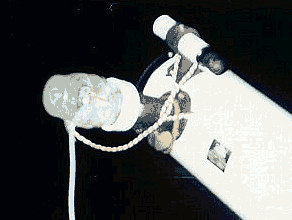
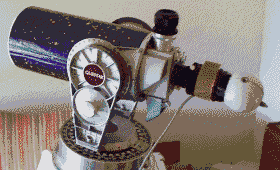
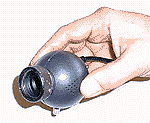
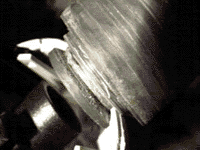
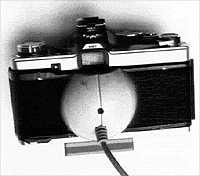
This mounting is inspired
by Robert Labre, and it allows to make the
focusing with the reflex camera :
|
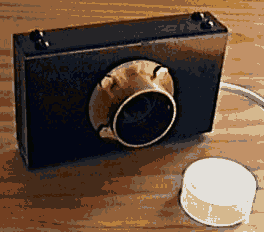
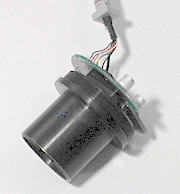
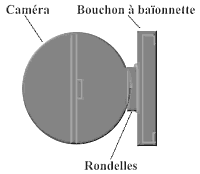
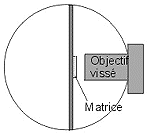
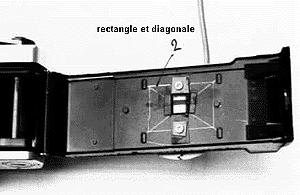
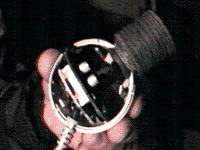
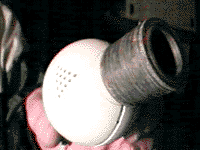
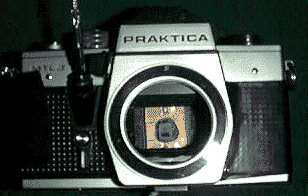
This adjustment
is for a "connectix" Black&White quickcam
on an "olympus OM 2 " reflex camera, but it's
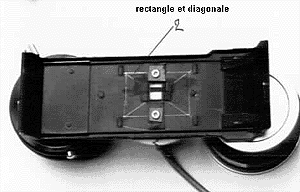
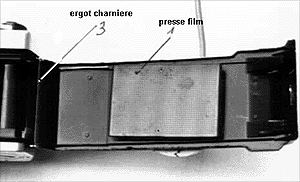
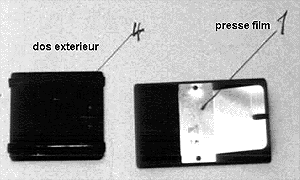
possible to used on others patterns. 1) open the case (as for installing a film). 2) get out the film press in pulling on the right side, and pulling laterally on the right after (it's a bit hard, because there is a catch in a notch) (index 1 on the photo). 3) close the box and pull out the objective. 4) mount a soft shutter release and take a photo with a B exposure (infinite exposure), so the mirror will be set up and the shutter will be opened ; by this way, it is possible to access the back of the camera. 5) plot the window borders on the back with an etching needle or with dividers (this determines the photograph position (index 2 on the photo). 6) close the camera, mount again the objectives or a mask. 7) pull out the back in pushing down the small screw located on the top of the hinge, this frees the spur on the top (index 3 on the photo). Then pull out the external part of the back (which indicates the type of the film used) which is simply stuck under the black sleeving. 8) plot the diagonals of the rectangle plotted at the step 5, this operation determines exactly the center of the photograph. The CCD sensor will be installed at this position . 9) drill exactly in the center of the cross a 6mm hole. This one will be extended in a rectangular shape window shifted upside. So the small sensor's rectangle will be centered respect to diagonals. BE CAREFUL of not inverting up and down ! The hinge must be on the left when looking at the plotting .This window must be large enough in order that the sensor can go through the window without touching borders, and to allow a good centering. This is the most critical step, and you need a small file (see drawings and quotations). 10) when the efficient part of the sensor is centered (use the plotted diagonals), mark out the printed circuit's holes (they used to hold the optics) and drill respect to the screws used (see below). 11) cut a printed circuit diameter's round in insulating material and shape a window in order to let the sensor get in (it must be the smallest possible to protect well the sensor's pins), drill two holes for the screws (if you wish to put the sensor at the same level that the film plan, you should shape the insulating as thin as possible). The advantage to install the sensor in this way is to keep the possibility to focus, and to use the camera with conventional objectives. 12) mount the insulating on the printed circuit on the back with the original screws if you manage to find adapted nuts. You 'd rather put the nuts with insulating washers on the components side and the screws heads on the other side, because if you put back the film press, you'll be able to the camera with argentic films. 13) cut the high printed circuit's part which is above the back (there 's nothing in this area) which will be on the viewfinder line. 14) the last thing to do is to make a protection for the camera. From me, I used the two original half spheres and I sawed them at the spurs' level which held. Stuck, as written in stanza 13, in order to not see the back in the viewfinder. That's all !! Of
course all improvement is welcome :-))) |
This mounting is equivalent to the previous one. Yves Lhoumeau designed it, see all explanations on his web site :


The followings mountings
have been collected on different amateur web sites. Thanks to
everybody.
Each mounting has its own
advantages, and you should find ideas from them :
(click on photos to access to the wanted site)