C-mount for astrocams
This is a detailed explanation from Sylvain Weiller with images of a pseudo C-Mount making for use with Webcams. It has been realised more specifically for the Quickcam VC. It could be adapted to suit other brands. The world wide use of C-mounts permits tu use the Quickcam easily with a 1"1/4 telescope adaptater (visit Irondack Video Astronomy) , a video camera lens (especially nice with very wide field ones), a 16mm lens, photographical lenses (visit AVAastro), all kinds of microscopes and binocular lenses ...
Items needed :
- PVC threaded cap,
Diam 63mm
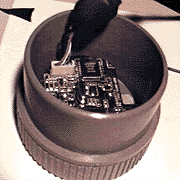
- 20/27" copper
blocking nut
- circuit board
- super glue
- plastic heat glue with heat
gun
- black permanent and also
water soluble marker with fine tip.
- small Allen wrenches (not
metric...easy for you !)
- An electric drill and a
piece of flat PVC to make a cap.
- Un objectif C A standard C
video lens and/or a C-mount adapter of the diameter of your
eyepieces.
And... a few hours of
meticulous work !
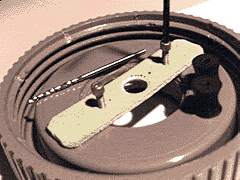
First version (easier)
:
1) Make a 1/2" hole well
centered in the 63mm PVC cap.
2) Make a small hole in the
rear cylinder and thread it at standard photo size.
3) Center & glue with
super glue the flat copper nut.
4) Poor hard PVC glue around
the nut for solidity.
5) Cut circuit board support
as indicated in the figure. Also prepare 2 or 4 small square
pieces (1/4")
6) Drill the two holes (1.3
to 1.4mm) separated by 22.5mm for the small screws of the
camera and the central hole (6mm). Carefully thread
the small holes, forcing with the screws. Shape the two sides of
the big hole with a 9mm drill on both sides.
7) Glue the small circuit
boards pieces in order to have proper focus (test may be
necessary as there are different classes of C objectiv)
8) put and center the
support, copper side outwards, using an objectiv as a lens.
Here you can use the water soluble marker pen, putting a small
black spot dead center on the rear lens. Glue now the
supporting board with super glue.
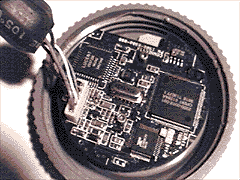
9) Scew the QCam circuit
board after removal of the black filter holder. Take care as the
wires leading to the white connector are fragile. Make tests for
proper focusing. In any case it will be rather easy to remove one
layer or add one more.
10) Make the rear cap with a
hole on the side for main power line and fix it with screws or
scotch tape.
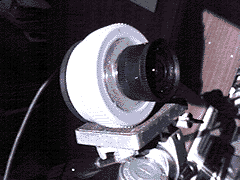
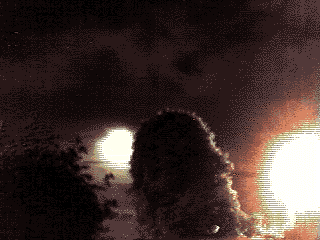
14) All done ! Here is an
example with a 4mm C lens. Field can be as high as 90°(very nice
to catch meteors).
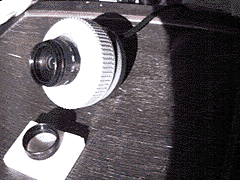
"Semi-pro"
Version :
This semi-pro C-mount is
intended for B&W and VC Quickcams (USB & //) :
Images are left with franch
explanation for space considerations. It takes more time to
make burt it is more precise. It permit 3D ajustment of the focal
point at any moment with 3 easely set nuts. Test have been
successfull with 4mm & 16mm video lenses and
Nikkon 50 mm lens perfect for eclipses.
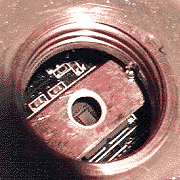
Legends:
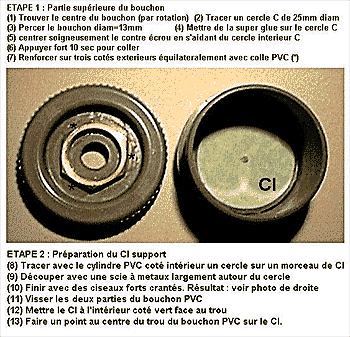
"Etape 1" Top of
cap.
find center by rotation. Draw
1" circle. Drill a 13mm hole in the center. Poor super glue
on circle. Put nut on glue. Place correctly before pressing hard
for 10 sec. Reinforce with PVC glue.
"Etape 2"
Preparation of support.
Trace with the inside of the
PVC cylinder a circle on a piece of circuit board. Cut with small
saw widely around. Finish with strong cisors with toothes
(right). Screw the 2 partsof the cap. Put circuit board support
inside, uncoppered face toward hole. Draw a black point in the
center.
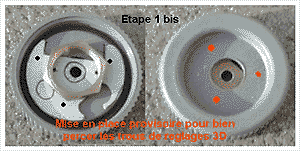
"Etape 1 bis" Place
not permanently to find the best place for 3d adjusting screws.
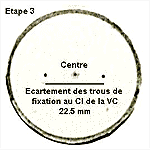
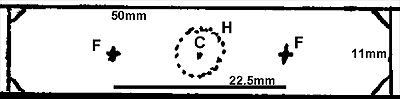
"Etape 3" small holes are to beseparated with precisely
22.5 mm.
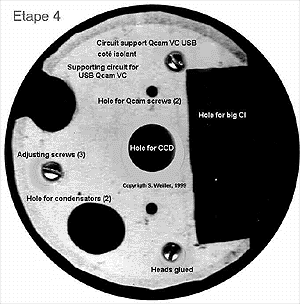
"Etape4" Ok
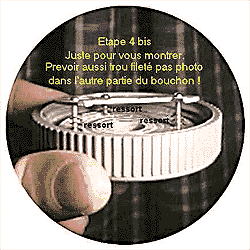
"Etape 4 bis" Just to show better the little springs.
Don't forget the hole with Kodak thread on the other part.
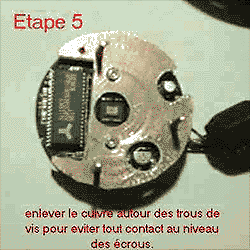
"Etape 5" Remove all copper around holes to avoid any
electrical contact with nuts.
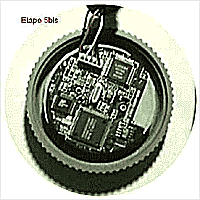
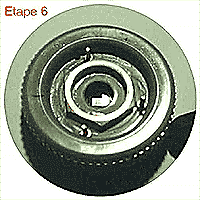
"Etape 5 bis & 6" No comments.
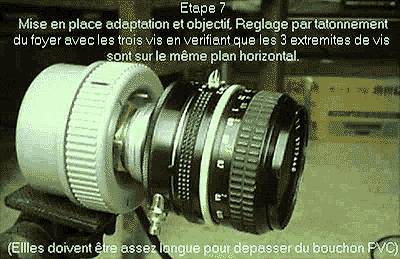
"Etape 7" Placing lenses. Adjust with camera connected
to computer and working. The 3 screw tips should be normally on
the same level plane. Also they should be long enough.
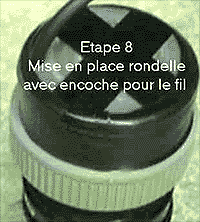
"Etape 8" intalling rear plug.
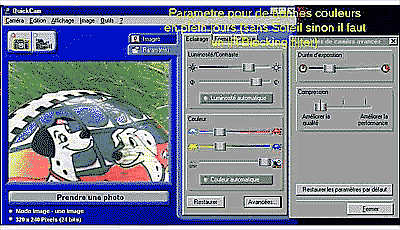
Example pictures with lens shown and also base for adjusting
parameters.